How To Make A Paper Notebook
- Oct 20, 2020
- 5 min read
Updated: Mar 11, 2023
Paper notebooks (aka Traveler's Notebooks) are popular among paper crafters and used for everything from list making to memory keeping. It's a perfect & portable blank canvas for creativity!

I've designed this notebook specifically as a companion alongside my December Daily project this year. I've always wanted something that I could easily grab to make quick notes in and jot down ideas. A place for raw thoughts that may or may not make it into my finished album. I love that this notebook doesn't have to be "perfect".
It's super easy to make a notebook like this with some blank paper, and fun card stock pattern paper for the cover. I also knew that I wanted to add a bit of structure to my notebook since I would be using to document specific things in December. I choose to use a digital template from Ali Edwards as a base for my pages, then I added my own text to the pages to act as categories for my notes. I chose to create this using Canva, because it's super easy to use, but the steps I'm going to share should work in what ever digital design/editing software you like to use. (Canva is creative design software that is user friendly, and free to use. Canva Pro is an upgraded feature packed version available for an additional fee. This tutorial was done using Canva Pro. All features may not be available in the basic version).


Here's a photo walk through of the steps.
1. Create a new design in Canva sized to 8.5" x 11" (letter sized)
2. Upload in PNG or JPEG (drag & drop) the digital template into Canva, and click to add it to your page. PDF files now upload seamlessly to Canva Pro.
3. Size the image box to 8" x 8".

To make the notebook using the page design without alterations: 4. Click the copy icon to duplicate the page. You now will have two identical pages. 5. Download both pages in Canva and save. 6. Print both pages, setting your printer on "print two sided" + "flip on long edge". 7. Print as many pages as you wish to add to your notebook. A good number is usually between 10-12 double sided pages. Follow the "how to assemble" instructions below.
I love this template design for the notebook pages, it's the perfect mix of dots, lines & space for drawing or flat embellishments.
I decided to add my own text to the pages for more "guided" journaling.

HOW TO HIDE TEXT
1. Using the "elements" icon on the left, search for a rectangle shape.
2. Click on it to add it to your page.
3. Resize the shape smaller using the side marks or corners.
4. Drag the rectangle into position to cover the text. (shown in gray)
5. Recolor the image to "white" to hide the text.

HOW TO ADD TEXT
1. Using the "text" icon, select a text line.
2. Drag and drop it where you want it on your page.
3. Choose your font style, change colors & adjust size to your liking. (this is where you get to play around with the limitless options available in Canva)
Repeat this to add multiple lines of text.
once you finalize your text, drag your curser over the text to "group" the text lines together.
This makes it easy to copy & paste to additional pages, without starting over each time.
Canva offers a ton of free & helpful tutorials if you're just learning this software. But I highly recommend this class as its core focus is on using Canva for memory keeping.

You can see here that I've copied the page design and changed the text using the same styles & format to create multiple pages for the notebook. It's easy to drag and drop the pages on this screen to re-arrange the page order. Keeping in mind that you will be printing two sided, you want to make sure the page order is correct.
PRINTING TIP: Download and print in B&W on draft mode as a first run in assembly. You can make any adjustments in page order, and then print a final copy for assembly.


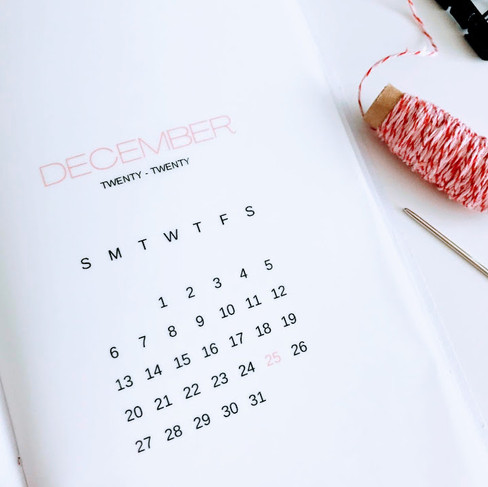
I also chose to add two intro pages to my notebook, a title page & a modern looking calendar for December. Here's how I created these pages:
Title Page: I deleted the notebook template, but left the lines of grouped text. Positioned the title to the left side and centered, when folded.
Calendar Page: For this I created narrow "columns" of text to evenly align the numbers. Once the numbers were in place and lines were visually pleasing I grouped the set of text boxes to make centering the calendar on the page simpler, keeping in mind the centered placement.
I chose to print the calendar page on Vellum paper. I think it adds an upscale professional look to the notebook.
PRINTING TIP: The first two pages are downloaded & printed separately, single sided only.


HOW TO ASSEMBLE YOUR NOTEBOOK
1. Trim all of your pages to 8" x 8"
2. Trim your card stock cover to 9" W x 8.25" H. Keep in mind the direction of your pattern if there is one.
ASSEMBLY TIP: the larger cover means you don't have to trim your pages evenly after they are folded.
3. Fold all pages in half. Using a paper score tool may be helpful, but not necessary.
4. Assemble the pages in an order you like. I ended up flipping a couple of pages around after printing.
5. Bind your notebook. My awesome stapling tip is below!
For this notebook, I choose to pierce three tiny holes at the top & bottom, and stitch together with bakers twine. Then I wrapped twine twice around the spine & tied a bow with tails that dangle.
6. Embellish the cover, if desired. I chose to add a paper tag stamped with the month/year.
ASSEMBLY TIP: binder clips work really well to hold & keep your pages from shifting when you're putting this book together.
I've put together a resource & supply list with the items used in this tutorial below. And here's the game changing tip for stapling your notebooks!
Remember all those cork bulletin boards in school classrooms?
If you're a teacher, you probably knew this already. 1. Using an ordinary stapler, open it up so it's extended flat. I used this cork hot pad found at Ikea as a base. 2. Lay the notebook cover side up on top of the cord pad. 3. Place the staple edge on the folded center line and push down to staple. If you did it correctly, the staple should have gone into the cork pad. 4. Gently pull on the notebook to remove the staple from the cork pad. 5. Using a bone folder, or other flat tool, fold over the ends of the staple to secure the notebook. This tip is a total game changer! No heavy long reaching stapler required.
RESOURCE & SUPPLY LIST
TN Template: Ali Edwards // Digital Notebook Page
Design Software: Canva
Fonts Used:
December Title // Agrandir Grand Thin
Calendar Numbers // Arimo
Category Titles // Madelyn
Tiny Text // Adhaya Libre Regular
Supplies:
Card Stock Cover: Crate Paper // Merry Days Collection
Embellishment: Feed Your Craft // Holiday Happiness
Black Binder Clips: Amazon
I hope this post has inspired you to make your own notebooks! If you've made one, tag me
Comments
Denise: Just found your blog and am SO excited! I wish it had an option to be delivered to my email so I don't miss a post. LOVE YOUR CONTENT AND YOUR STYLE. I'll be a regular!


keonhacai5 bữa mình rảnh rảnh nên ghé thử xem có gì hay ho, chủ yếu coi cách họ trình bày thôi chứ mình không phải dân ngồi tính kèo. Vào cái thấy bảng kèo nhà cái odds cập nhật liên tục, kiểu vừa kéo xuống là số nhảy nhảy theo thời gian thực nên nhìn khá “sống”, không bị cảm giác dữ liệu cũ. Mình cũng để ý họ có đoạn giải thích thuật ngữ cơ bản như kèo châu Á (handicap), đọc lướt vài dòng là hiểu đại khái cửa trên chấp cửa dưới thế nào. Giao diện nhìn gọn, số liệu xếp theo cột rõ ràng, mấy bảng tỷ lệ odds đặt ngay ngắn nên lướt nhanh vẫn…
bongdalu808 hôm bữa mình rảnh nên bấm thử coi giao diện ra sao thôi, kiểu tò mò chứ không ngồi đọc sâu gì hết. Vừa vào là thấy ngay mấy khung tỷ số trực tuyến với lịch thi đấu nằm rõ ràng, nhìn phát hiểu luôn chứ không bị rối chữ. Mình thích cái cách họ chia block thông tin to, lướt xuống vẫn dễ theo dõi, không phải căng mắt tìm. Có cái thanh chọn múi giờ GMT nữa, kéo qua lại được nên ai hay xem theo giờ khác chắc đỡ phải tự đổi giờ trong đầu. Mình nghịch vài phút là quen đường đi vì menu đặt gọn, bấm không bị vòng vèo. Nói chung nhìn khá…
keonhacai mình mới ghé thử vì thấy bạn bè nhắc hoài, ai dè vào cái là thấy bảng tỷ lệ kèo hiện ngay trên trang, không phải bấm qua lại nhiều. Mình không phải dân soi kèo chuyên nghiệp nên chủ yếu nhìn cách họ sắp xếp thông tin thôi, và thấy khá ổn: số liệu chia cột rõ, nhìn lướt một phát là hiểu đang ở kèo nào. Có cái mình thích là phần biến động kèo thể hiện khá dễ nhận ra, kiểu thay đổi là thấy ngay chứ không bị giấu sâu trong menu. Lướt trên điện thoại cũng không bị rối mắt, chữ và khoảng cách vừa phải. Nói chung trải nghiệm kiểu “mở ra xem…
kèo nhà cái 5 hôm bữa mình lướt thấy nên bấm vào xem thử cho biết, chủ yếu coi giao diện với cách họ chia bài thôi. Vào trang thấy mấy tiêu đề nhận định soi kèo đặt khá ngay ngắn, nhìn cái là biết đang nói trận nào chứ không bị rối. Mình có lướt trúng bài Stjarnan vs Valur (02h15 ngày 18 07), bên dưới còn có thêm phần kèo tài xỉu với phạt góc đi kèm nên tiện nếu ai muốn xem nhanh. Mình thích kiểu họ để nội dung theo từng khối, khoảng trắng vừa đủ nên đọc lướt không mỏi mắt, kéo xuống là các bài hiện thành cụm rõ ràng theo tiêu đề trên…